Node Drawtypes
This chapter is incomplete
Some drawtypes have not been explained yet, and placeholder images are being used.Introduction
In this chapter we explain all the different types of node drawtypes there are.
First of all, what is a drawtype? A drawtype defines how the node is to be drawn. A torch looks different to water, water looks different to stone.
The string you use to determine the drawtype in the node definition is the same as the title of the sections, except in lower case.
- Normal
- Airlike
- Liquid
- FlowingLiquid
- Glasslike
- Glasslike_Framed
- Glasslike_Framed_Optional
- Allfaces
- Allfaces_Optional
- Torchlike
- Nodebox
This article is not complete yet. These drawtypes are missing:
- Signlike
- Plantlike
- Firelike
- Fencelike
- Raillike
- Mesh
Normal
This is, well, the normal drawtypes.
Nodes that use this will be cubes with textures for each side, simple-as.
Here is the example from the Nodes, Items and Crafting chapter.
Notice how you don’t need to declare the drawtype.
minetest.register_node("mymod:diamond", {
	description = "Alien Diamond",
	tiles = {
		"mymod_diamond_up.png",
		"mymod_diamond_down.png",
		"mymod_diamond_right.png",
		"mymod_diamond_left.png",
		"mymod_diamond_back.png",
		"mymod_diamond_front.png"
	},
	is_ground_content = true,
	groups = {cracky = 3},
	drop = "mymod:diamond_fragments"
})
Airlike
These nodes are see through and thus have no textures.
minetest.register_node("myair:air", {
	description = "MyAir (you hacker you!)",
	drawtype = "airlike",

	paramtype = "light",
	-- ^ Allows light to propagate through the node with the
	--   light value falling by 1 per node.

	sunlight_propagates = true, -- Sunlight shines through
	walkable     = false, -- Would make the player collide with the air node
	pointable    = false, -- You can't select the node
	diggable     = false, -- You can't dig the node
	buildable_to = true,  -- Nodes can be replace this node.
	                      -- (you can place a node and remove the air node
	                      -- that used to be there)

	air_equivalent = true,
	drop = "",
	groups = {not_in_creative_inventory=1}
})
Liquid
These nodes are complete liquid nodes, the liquid flows outwards from position using the flowing liquid drawtype. For each liquid node you should also have a flowing liquid node.
-- Some properties have been removed as they are beyond the scope of this chapter.
minetest.register_node("default:water_source", {
	drawtype = "liquid",
	paramtype = "light",

	inventory_image = minetest.inventorycube("default_water.png"),
	-- ^ this is required to stop the inventory image from being animated

	tiles = {
		{
			name = "default_water_source_animated.png",
			animation = {
				type     = "vertical_frames",
				aspect_w = 16,
				aspect_h = 16,
				length   = 2.0
			}
		}
	},

	special_tiles = {
		-- New-style water source material (mostly unused)
		{
			name      = "default_water_source_animated.png",
			animation = {type = "vertical_frames", aspect_w = 16, aspect_h = 16, length = 2.0},
			backface_culling = false,
		}
	},

	--
	-- Behavior
	--
	walkable     = false, -- The player falls through
	pointable    = false, -- The player can't highlight it
	diggable     = false, -- The player can't dig it
	buildable_to = true,  -- Nodes can be replace this node

	alpha = 160,

	--
	-- Liquid Properties
	--
	drowning = 1,
	liquidtype = "source",

	liquid_alternative_flowing = "default:water_flowing",
	-- ^ when the liquid is flowing

	liquid_alternative_source = "default:water_source",
	-- ^ when the liquid is a source

	liquid_viscosity = WATER_VISC,
	-- ^ how fast

	liquid_range = 8,
	-- ^ how far

	post_effect_color = {a=64, r=100, g=100, b=200},
	-- ^ color of screen when the player is submerged
})
FlowingLiquid
See default:water_flowing in the default mod in minetest_game, it is mostly the same as the above example.
Glasslike
When you place multiple glasslike nodes together, you’ll notice that the internal edges are hidden, like this:
minetest.register_node("default:obsidian_glass", {
description = "Obsidian Glass",
drawtype = "glasslike",
tiles = {"default_obsidian_glass.png"},
paramtype = "light",
is_ground_content = false,
sunlight_propagates = true,
sounds = default.node_sound_glass_defaults(),
groups = {cracky=3,oddly_breakable_by_hand=3},
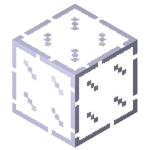
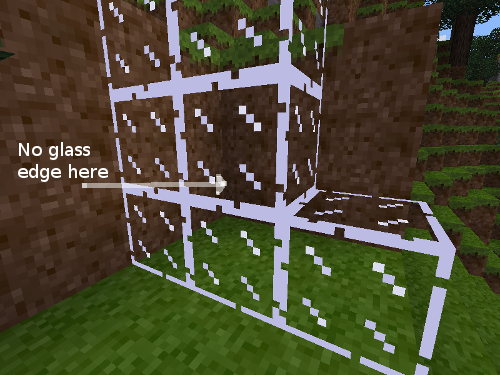
})Glasslike_Framed
This makes the node’s edge go around the whole thing with a 3D effect, rather than individual nodes, like the following:

minetest.register_node("default:glass", {
	description = "Glass",
	drawtype = "glasslike_framed",

	tiles = {"default_glass.png", "default_glass_detail.png"},
	inventory_image = minetest.inventorycube("default_glass.png"),

	paramtype = "light",
	sunlight_propagates = true, -- Sunlight can shine through block
	is_ground_content = false, -- Stops caves from being generated over this node.

	groups = {cracky = 3, oddly_breakable_by_hand = 3},
	sounds = default.node_sound_glass_defaults()
})
Glasslike_Framed_Optional
“optional” drawtypes need less rendering time if deactivated on the client’s side.
Allfaces
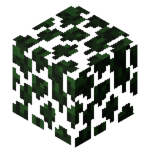
Allfaces nodes are partially transparent nodes - they have holes on the faces - which show every single face of the cube, even if sides are up against another node (which would normally be hidden). Leaves in vanilla minetest_game use this drawtype.
minetest.register_node("default:leaves", {
	description = "Leaves",
	drawtype = "allfaces_optional",
	tiles = {"default_leaves.png"}
})
Allfaces_Optional
Allows clients to disable it using new_style_leaves = 0, requiring less rendering time.
TorchLike
TorchLike nodes are 2D nodes which allow you to have different textures depending on whether they are placed against a wall, on the floor, or on the ceiling.
TorchLike nodes are not restricted to torches, you could use them for switches or other items which need to have different textures depending on where they are placed.
minetest.register_node("foobar:torch", {
	description = "Foobar Torch",
	drawtype = "torchlike",
	tiles = {
		{"foobar_torch_floor.png"},
		{"foobar_torch_ceiling.png"},
		{"foobar_torch_wall.png"}
	},
	inventory_image = "foobar_torch_floor.png",
	wield_image = "default_torch_floor.png",
	light_source = LIGHT_MAX-1,

	-- Determines how the torch is selected, ie: the wire box around it.
	-- each value is { x1, y1, z1, x2, y2, z2 }
	-- (x1, y1, y1) is the bottom front left corner
	-- (x2, y2, y2) is the opposite - top back right.
	-- Similar to the nodebox format.
	selection_box = {
		type = "wallmounted",
		wall_top = {-0.1, 0.5-0.6, -0.1, 0.1, 0.5, 0.1},
		wall_bottom = {-0.1, -0.5, -0.1, 0.1, -0.5+0.6, 0.1},
		wall_side = {-0.5, -0.3, -0.1, -0.5+0.3, 0.3, 0.1},
	}
})
Nodebox
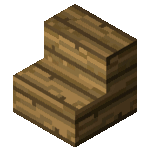
Nodeboxes allow you to create a node which is not cubic, but is instead made out of as many cuboids as you like.
minetest.register_node("stairs:stair_stone", {
	drawtype = "nodebox",
	paramtype = "light",
	node_box = {
		type = "fixed",
		fixed = {
			{-0.5, -0.5, -0.5, 0.5, 0, 0.5},
			{-0.5, 0, 0, 0.5, 0.5, 0.5},
		},
	}
})
The most important part is the nodebox table:
{-0.5, -0.5, -0.5,       0.5,    0,  0.5},
{-0.5,    0,    0,       0.5,  0.5,  0.5}
Each row is a cubiod which are joined to make a single node. The first three numbers are the co-ordinates, from -0.5 to 0.5 inclusive, of the bottom front left most corner, the last three numbers are the opposite corner. They are in the form X, Y, Z, where Y is up.
You can use the NodeBoxEditor to create node boxes by dragging the edges, it is more visual than doing it by hand.
Wallmounted Nodebox
Sometimes you want different nodeboxes for when it is placed on the floor, wall, or ceiling like with torches.
minetest.register_node("default:sign_wall", {
	drawtype = "nodebox",
	node_box = {
		type = "wallmounted",

		-- Ceiling
		wall_top    = {
			{-0.4375, 0.4375, -0.3125, 0.4375, 0.5, 0.3125}
		},

		-- Floor
		wall_bottom = {
			{-0.4375, -0.5, -0.3125, 0.4375, -0.4375, 0.3125}
		},

		-- Wall
		wall_side   = {
			{-0.5, -0.3125, -0.4375, -0.4375, 0.3125, 0.4375}
		}
	},
})